


The rabbit-hole to the Moon
A few years ago, I got a 3D printer and started printing random stuff. At some point, I thought it would be fun to print a model of the Moon. So, I did what any foolish person would do: I loaded a highly detailed 3D model of the Moon, built using NASA's elevation and image data, into my slicer. Little did I know, at that moment, my mind fell into a rabbit hole it's still trying to escape.
You see, the slicer is a piece of software that takes your 3D model and "slices" it into layers that are then sent to the 3D printer. But as it does so, it strips the model of any applied textures, because the 3D printer can only print the shape, not the surface details. For example, if I give my printer a 3D model of a wooden ship, it will print the shape, even the grain of the wood, but it will still be made of plastic. As I saw the Moon without any texture, I realised, with a lot of excitement and a fair amount of shame:
What we see when we look at the Moon isn't just about its shape – it's about its very composition. The familiar face of the Moon is a testament to its geology, not just its topography.
Try it for yourself. Here's the Moon as you know it, with a colored surface, and here it is without. What you see when you look at the Moon is how bright the rocks are, how much light they reflect.
So, smarter people than I figured out that if you want to print a recognisable model of the Moon, you have to reverse this process. You don't need to modify how much light is reflected from the surface; you can instead vary how much light passes through the surface.
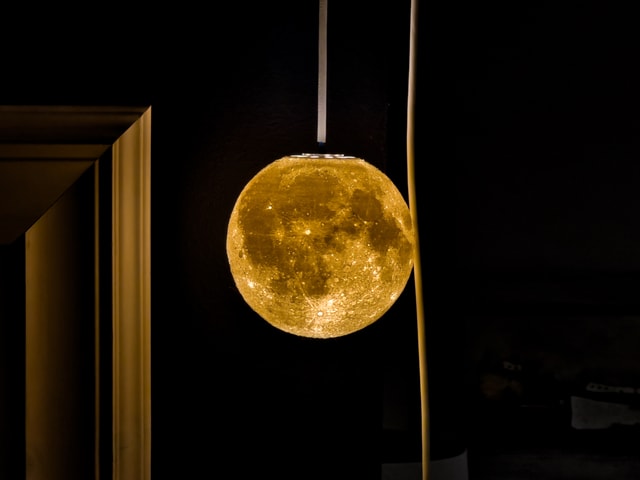
Using a really old Victorian technique called lithophane, it's possible to vary the thickness of a 3D printed Moon globe so that really bright spots are very thin and dark spots are thicker. When you light this globe from the inside, you can see the Moon as you know it, but you can also see what the Moon actually looks like when it's switched off.
Of course, the internet being what it is, someone had already done all this hard work, and various versions of these Moon lamps were available to download and print.
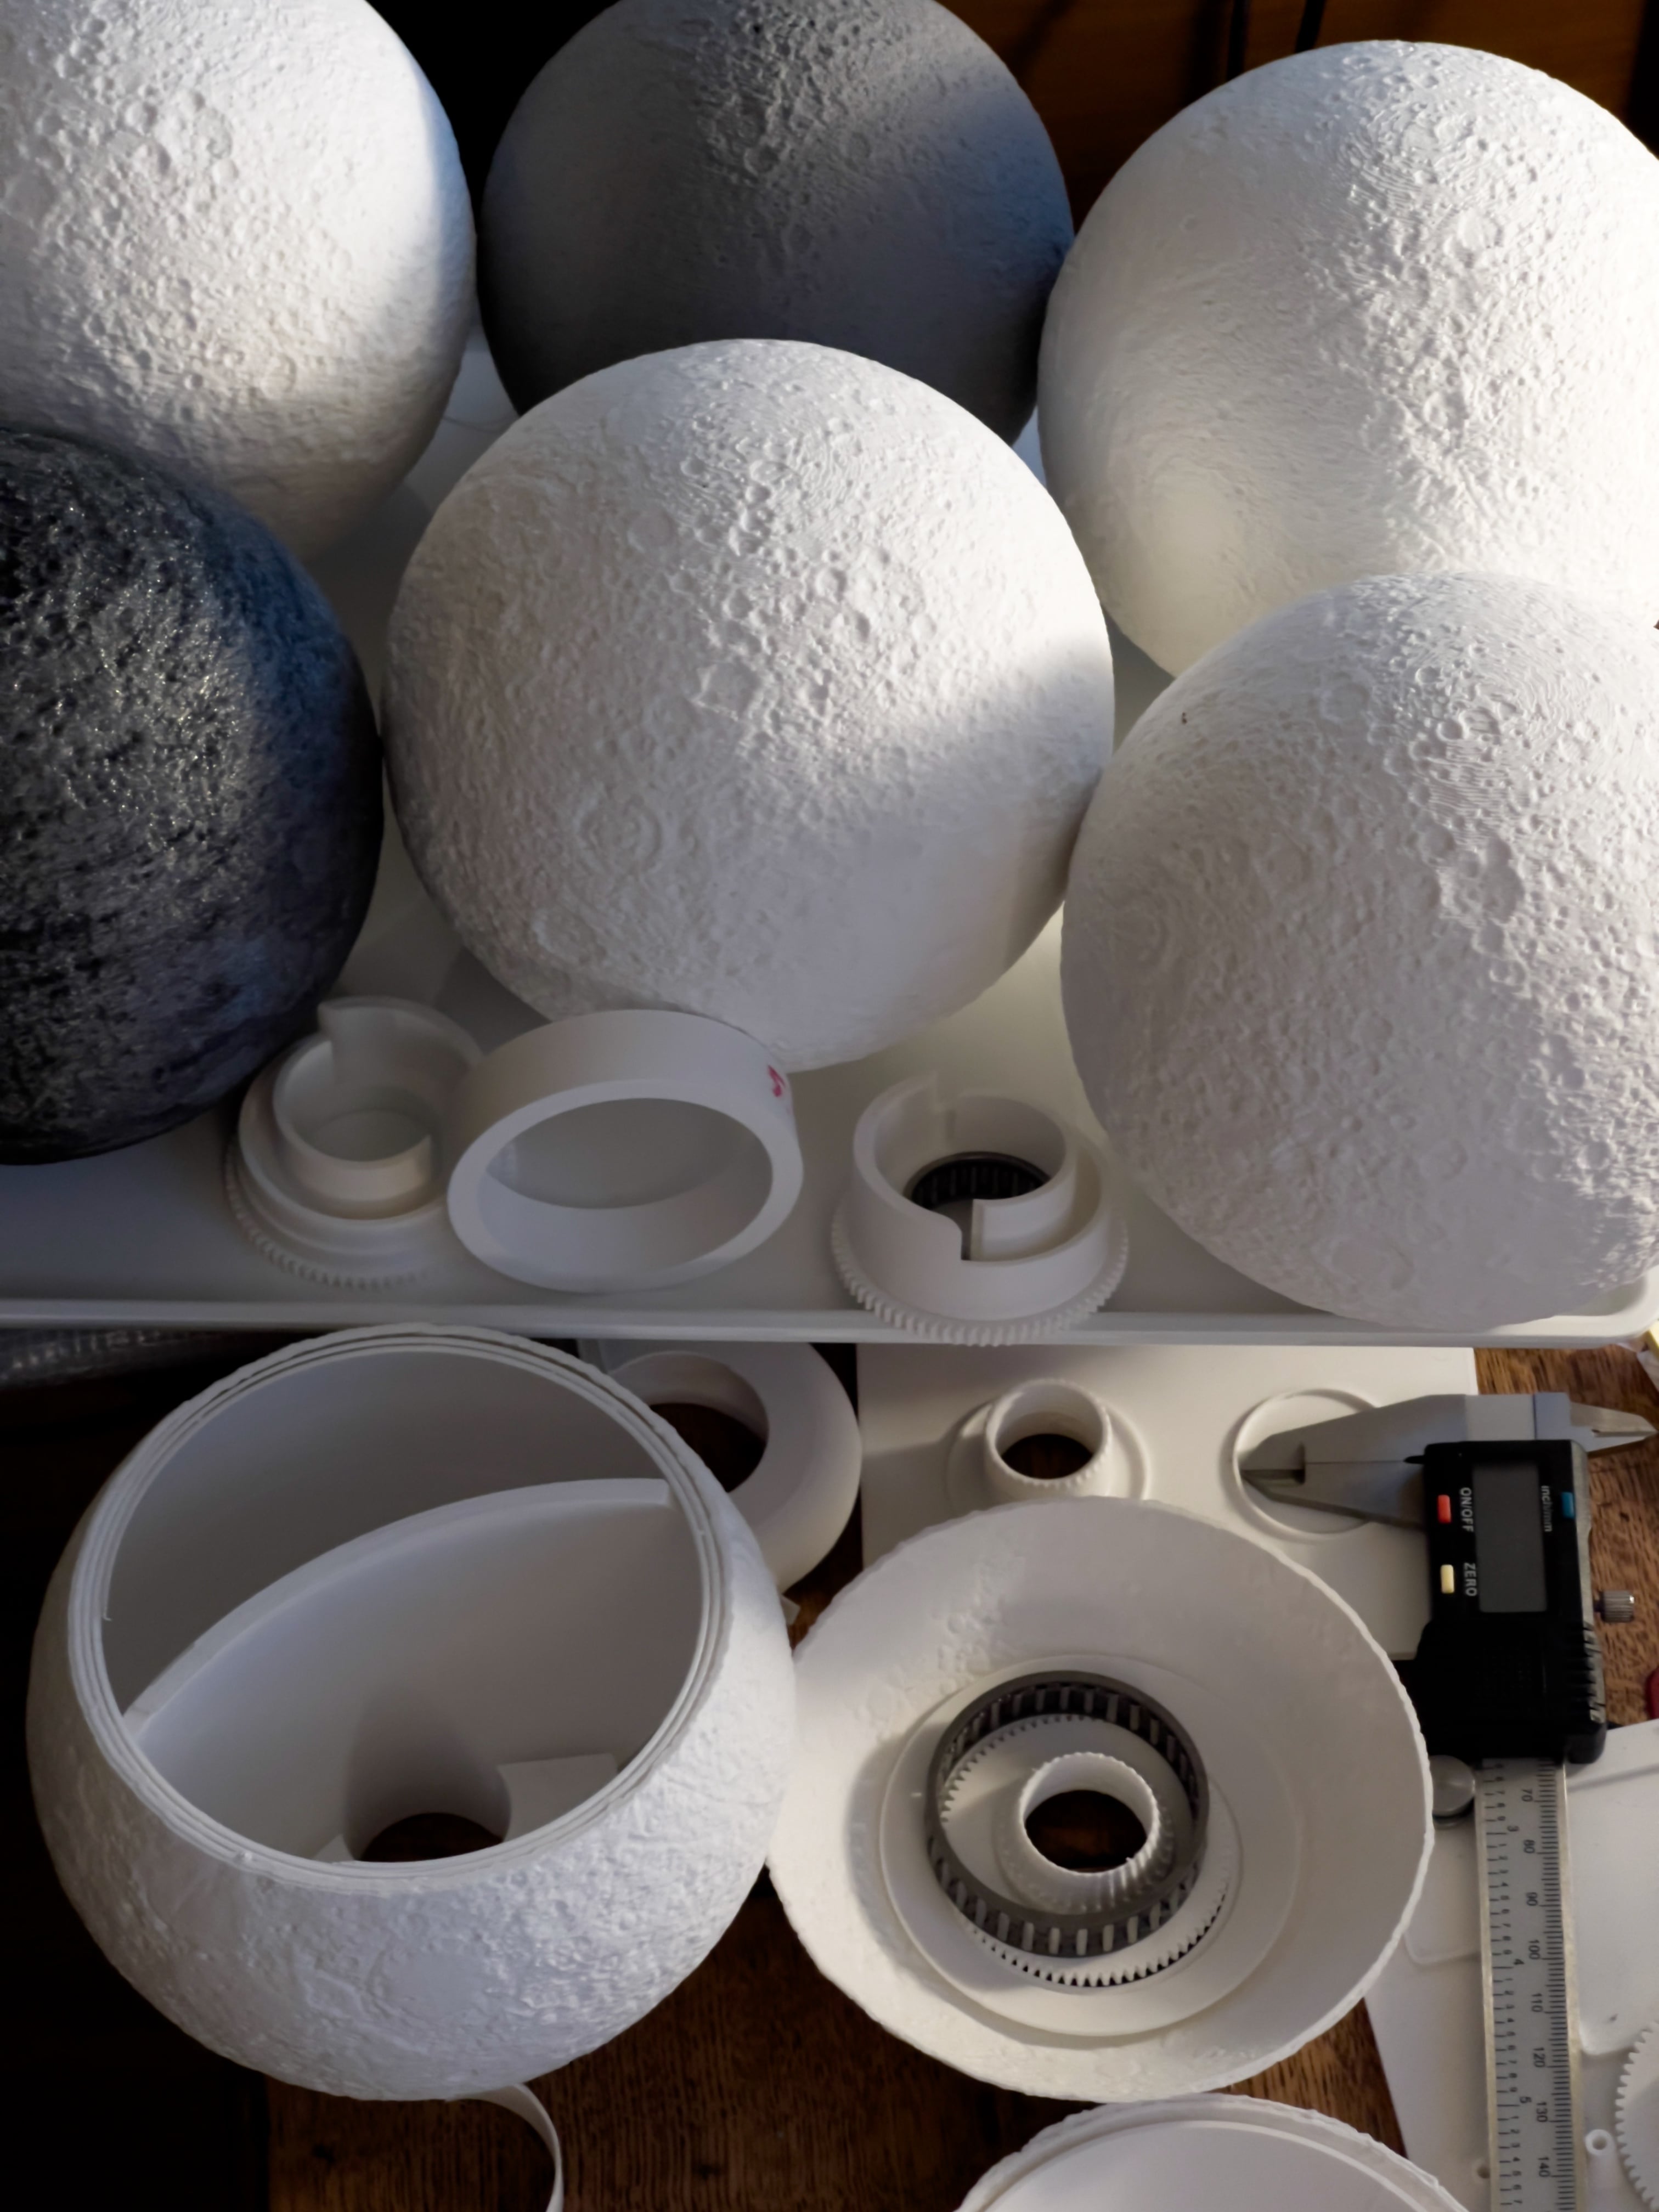
It took me quite a while to figure out the right size, print settings, and most importantly, what filament would yield the best results. If you don't have experience with 3D printing, you have to understand that this is a veeeeryyy slooooooow process. My 15cm diameter Moon took almost 24 hours to complete. So, many moons later, I got my Moon lamp, and any sane person would have probably stopped there. Nice Moon lamo hanging from the ceiling.
But I didn't. I wanted to get the Moon to change its phase.
I couldn't find any such project online, so I set out to build my own from scratch. I thought that, for me, the biggest challenge would be the electronics. If I couldn't crack that, this project would fail before it started, so I decided to begin there. I had quite a list of things I wanted to achieve:
- Use as many off-the-shelf components as possible.
- WiFi, web UI for control.
- As quiet as possible. Ideally silent.
- Very bright, to be visible in daylight.
- Display.
Guided by these principles, I concluded that it would be simplest to use a standard 5W GU9 lightbulb rather than some exotic, specialised LED circuit. This meant that I had to pull mains power into the lamp, and because I didn't want to have two cables going into it, I had to include a power supply too. I also wanted to avoid pushing 230V through a slip ring, so the light would have to be stationary and bang in the middle of the globe. But it also meant that I could keep my electronics circuit super simple. I had to control one relay to use as a switch for the light, and one stepper motor. I can do this.
I wasn't sure which microcontroller to choose. My gut was to go with Arduino, like any beginner would, but I decided to listen to some excellent advice from a friend who said, "go with ESP32. With that, you can send a real rocket to the Moon". And he wasn't joking. This thing is absolutely amazing. What an incredible piece of technology. For £15, I got a system-on-chip microcontroller, with WiFi, Bluetooth, LX7 dual-core processor, and the cutest 2.5cm OLED display.
Another tech marvel I got was a TMC2208 Stepper motor driver. This driver manages to move the motor in almost complete silence. Exactly what I needed.
The rest of the circuit was super simple. One 12V power supply with a voltage splitter to provide 5V to ESP32 and 12V to the stepper. I wanted to drive everything with as little current as possible. I needed to turn a light plastic shroud so I could keep things low, and most importantly, cool.
Getting all this to work was quite an interesting journey, which I won't bore you with. Suffice to say that from the software tooling to the ESP32 API, everything was completely new to me, and the last time I coded in C++ was before the Spice Girls met.
But, several moons later, my clunky code was happily spinning the motor every which way I wanted, and I thought, great. I have this in the bag.
Not quite. The electronics turned out to be easy. The shroud was the real challenge.
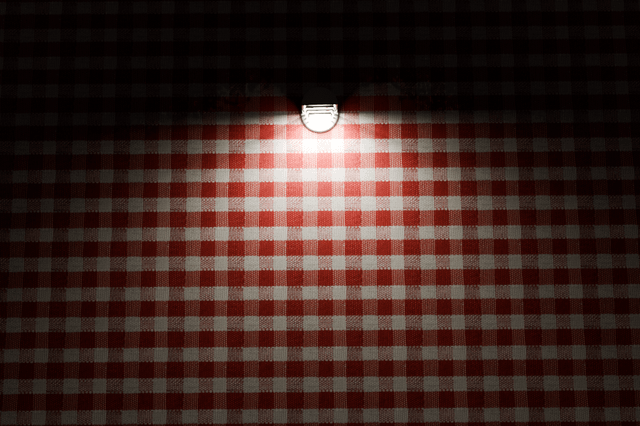
At first, I thought it would be best to create a simple and lightweight shroud that would cover the lightbulb and force the light to only illuminate 180º. It took me a bit of thinking to figure out how I could achieve this, and in the end, I settled on a design with slats that block the light from leaking to the sides.
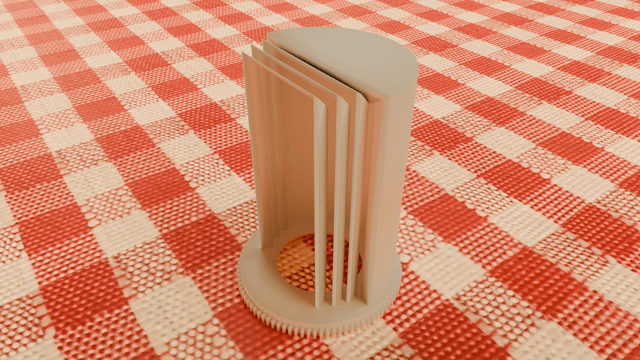
I was super happy when I realised that it worked exactly as I wanted it to. That was a happy moment.

It's even more obvious from the top
I knew that some diffuse light would bounce off the inside of the Moon and illuminate the dark side, but I thought that this would just enhance the realism because the dimmer light would mimic earthshine.
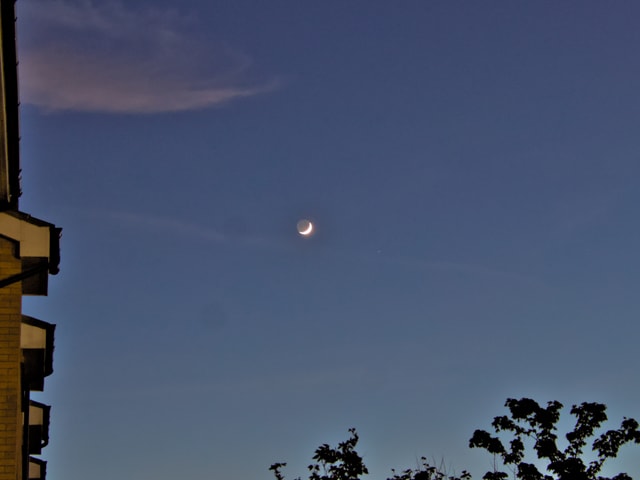
When we look at the Moon in one of its phases, we can often see the full disk of the Moon. The part in the shade is much, much dimmer, but still easily discernible. This is because it is lit by the Earth, in the same way the night side of the Earth is illuminated by the Moon. The Earthshine.
Like this one I captured the other day, from my garden.
Anyway, regardless of how clever my shroud design was, it wasn't good enough. The amount of light bouncing inside my Moon was so large that it was not possible to distinguish night from day, so back to the drawing board.
The obvious solution was to create a hemisphere inside the Moon which would cover the dark side, but that was not an easy task to accomplish, because hemispheres are notoriously out of balance, with all the mass on one side. At first, I thought that this might not be such a problem, as the distance between the shroud and the inside of the Moon was tiny. I knew the shroud would rub a bit, but as my movement was so slow, I believed this would not present an issue.
What an optimist.
There were several issues with this. Firstly, friction was an issue. I knew I could simply increase the power of the motor. I would be able to generate enough torque to break the whole contraption apart, but as I said earlier, I wanted this to be as quiet and as underpowered as possible. I really didn't want to build any stresses. Mechanical, electrical, or thermal.
Secondly, the light still leaked. I had to keep 2mm clearance between the inside of the Moon and the shroud. Mainly to allow for printing tolerance, but also because the inside of the moon was rough (the bulges on the inside determine lightness). I had to maintain the clearance from the highest peak. If the shroud was balanced this might have worked, but as it wasn't, it would tip, increasing the gap at the top from 2mm to 4mm which was way too much and the light would pour in through the gap illuminating the dark side.
Blast.
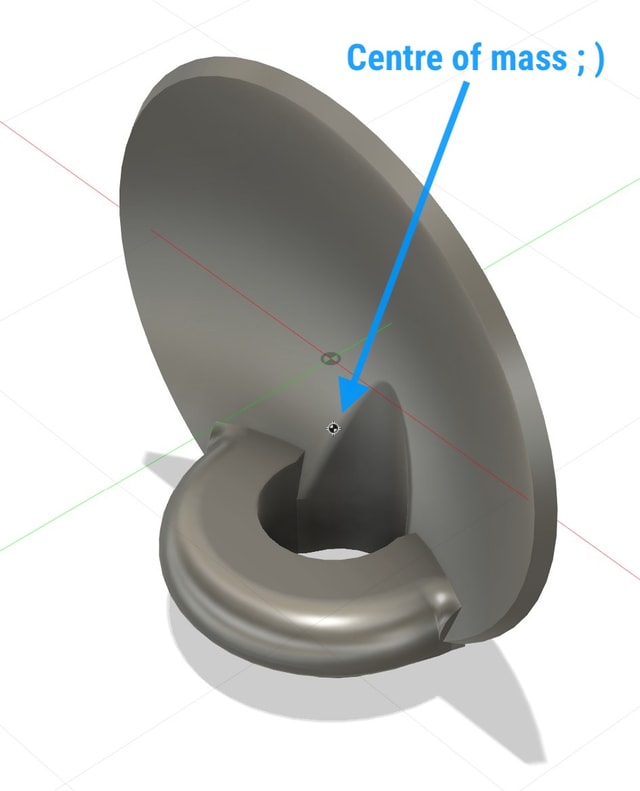
So... I had to do it the hard way. I designed a shroud which was perfectly balanced, with the center of gravity slap bang in the middle, and low. That sorted the torque issue. But, it was also apparent that light leakage even with a 2mm gap was too much. So, I decided to wrap the whole inside of the moon in a very thin sphere with a wall thickness of just 1mm. And, because the sphere was perfectly smooth, I was able to reduce the distance between the shroud and the inner sphere to only 0.5mm.
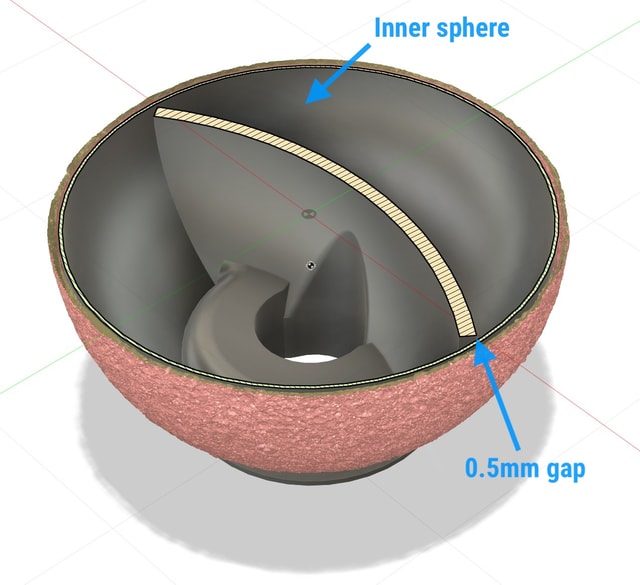
This turned out to be just perfect. Tight tolerances mean that there is no light leakage, and the diffuse light that is propagating through the inner sphere is just strong enough to ever so slightly illuminate the dark side, mimicking Earthshine.
Next step was software. This is where I felt most comfortable, but even this step was not without its challenges. Firstly, there was the sheer unforgivingness of working so close to the metal, and inability to run a proper debugger without dedicated hardware I didn't want to invest in. I had to resort to old-school print statements, a lot of patience, and errors would result in mysterious crashes.
Also, there was the challenge of memory. I wanted to make this as self-contained as possible. I didn't want to have to maintain a separate web property where I could host a complex UI with all the lovely assets, so I had to design a UI which would be just tens of KB in size, and which would not depend on any external resources. So, it was old-school hand-coded HTML using emoticons and special characters. Big shout out to whoever decided to put all the Moon phases into the emoticon set.
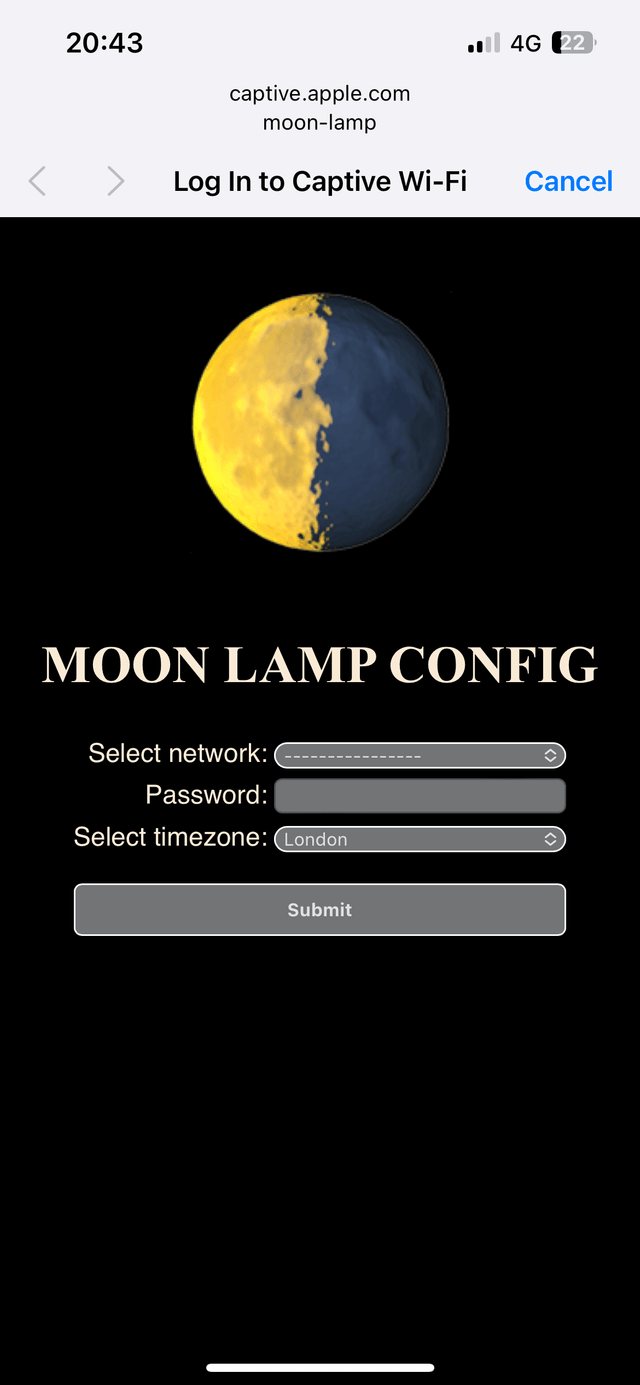
I created two main interfaces. One is a captive portal which launches when the lamp cannot find a network connection. It creates a dropdown with all the SSIDs it can find, a text field for the WiFi password, and another drop-down list with all the timezones. The lamp will perform a lot of date-time calculations, and knowing the right time zone was imperative. At first, I thought of having this as a simple text field, but expecting users to know the timezone they are in, and be able to enter it in the right way was a bit too much. On the other hand, a list of all available timezones is massive, and it alone takes up more space than both interfaces put together, but it was worth it in the end. It simplified my code a lot, and improved UX immeasurably. While I was able to use bootstrap CSS and Google fonts from a CDN to spice up the lamp UI, I had to resort to a simple unstyled UI for the captive portal. Still, not terrible, and it fits with the style of the control UI.
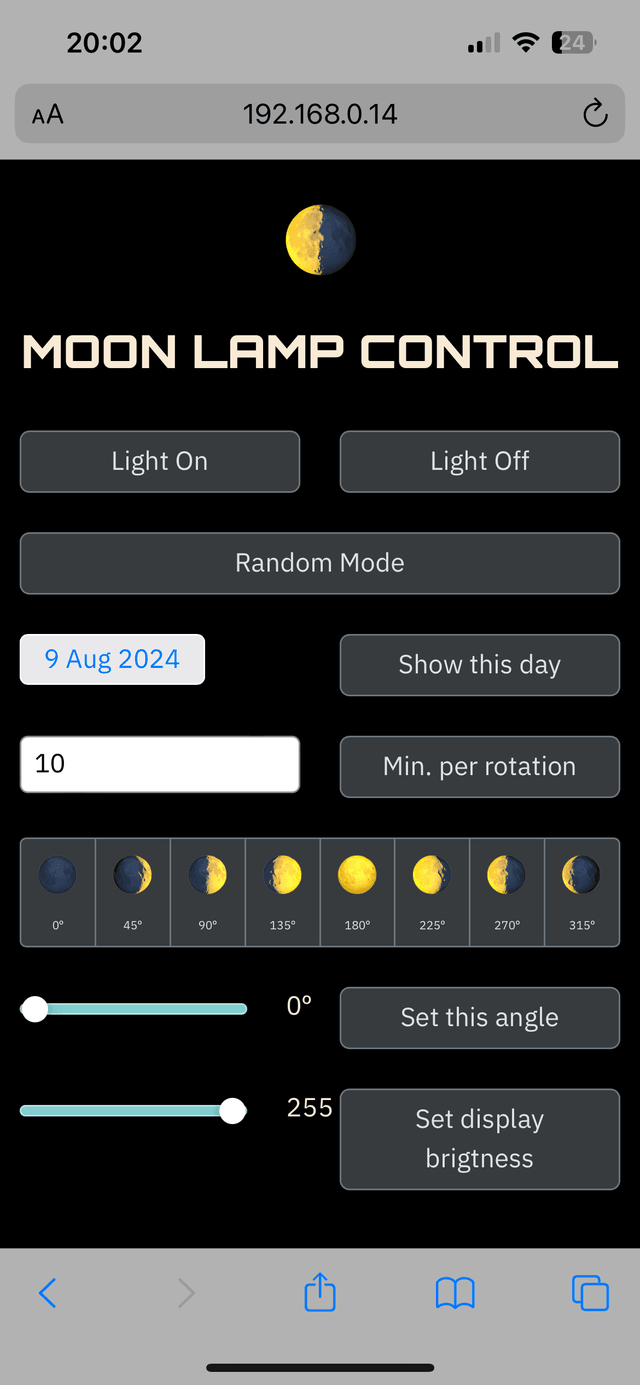
The second UI is for lamp control. It allows people to turn the light on or off, set the moon phase to a specific date, phase, or to set the lamp into my favorite mode: a slow, almost imperceptible rotation. I found that 10 to 20 minutes per rotation is ideal. It is slow enough to be unnoticeable, but fast enough to provide a different view of the moon every time you look at it.
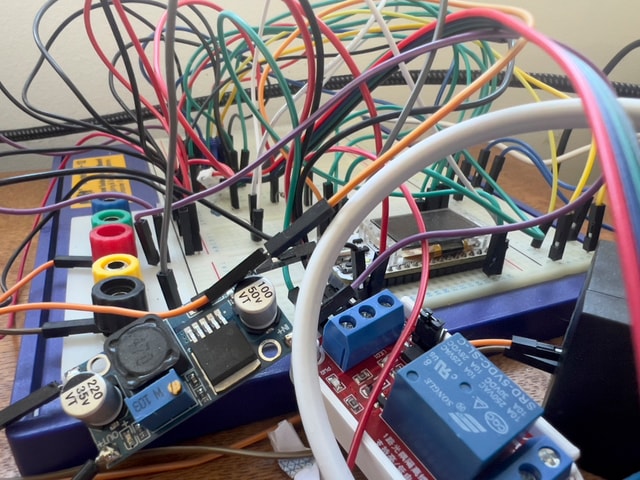
With all the pieces in place my lamp seems to work exactly as i wanted it to. It was working but the electronis were still on a breadboard. Not ideal, especially because I want to make some of these for my friends, and open-source everything and publish it as a project.
Enter KiCad.
As a complete novice in this field, this was quite a daunting task. Not only did I have no idea about the software, I barely knew what I had to do with it. But, I had the privilege of having a really good friend who is quite literally one of the world's authorities on PCB CAD applications. He's a dear friend, but I wanted to bother him as little as possible. So, as this was a really simple design, I decided to give it a go, and then send my files to my friend. He likes a good laugh.
To my surprise, my schematic was OK, and my PCB was functional. My friend pointed out quite a few improvements, which I accepted with immense gratitude, and this is my final PCB design.
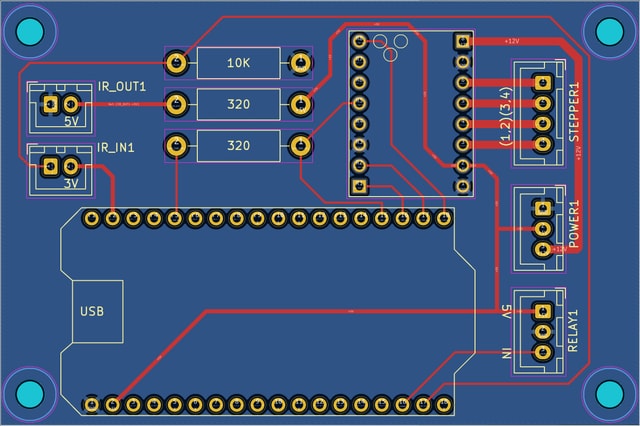
And this is it. All the elements are in place, and all that is left to do is to put it all together, and that got me thinking a bit. I am still not 100% sure about the design of the housing. I have several options I am working on, and in due course, it will all be wrapped up and published.
Hopefully soon. But you never know, maybe something else derails me for a bit.